Quantcast
Channel: paul's blog
Viewing all 53 articles
Browse latest View live

GNU Toolchain Cross-Compile Challenges

$
0
0

For the last several days I've been working to compile the latest free GNU Toolchain for ARM published by CodeSourcery (now owned by Mentor Graphics).

This process has not been easy.  In this lengthy blog post, I'll share all the patches I've written, with detailed explanations of exactly what errors I encountered, what I've learned about each problem, and how to work around it.

"Read mode" for all the gory details......

Why CodeSourcery's GNU Toolchain?

You might be wondering why CodeSourcery's version of the toolchain, rather than the official GNU sources.  The simple answer is CodeSourcery is the primary contributor of ARM support for microcontrollers.  Their code contains the best support for the latest ARM microcontrollers.  They publish only 2 binaries, Windows and 32 bit Linux.  If you want 64 bit Linux and Mac version (as I do), you need to compile your own.


Mentor's Build Script

As required by the open source licenses, they publish the full source.  They also publish a huge script with the exact commands they used to build the toolchain.  The script comes with this comment:

# This file contains the complete sequence of commands
# Mentor Graphics used to build this version of Sourcery CodeBench.
#
# For each free or open-source component of Sourcery CodeBench,
# the source code provided includes all of the configuration
# scripts and makefiles for that component, including any and
# all modifications made by Mentor Graphics.  From this list of
# commands, you can see every configuration option used by
# Mentor Graphics during the build process.
#
# This file is provided as a guideline for users who wish to
# modify and rebuild a free or open-source component of
# Sourcery CodeBench from source. For a number of reasons,
# though, you may not be able to successfully run this script
# directly on your system. Certain aspects of the Mentor Graphics
# build environment (such as directory names) are included in
# these commands. Mentor Graphics uses Canadian cross compilers so
# you may need to modify various configuration options and paths
# if you are building natively. This sequence of commands
# includes those used to build proprietary components of
# Sourcery CodeBench for which source code is not provided.
#
# Please note that Sourcery CodeBench support covers only your
# use of the original, validated binaries provided as part of
# Sourcery CodeBench -- and specifically does not cover either
# the process of rebuilding a component or the use of any
# binaries you may build.  In addition, if you rebuild any
# component, you must not use the --with-pkgversion and
# --with-bugurl configuration options that embed Mentor Graphics
# trademarks in the resulting binary; see the "Mentor Graphics
# Trademarks" section in the Sourcery CodeBench Software
# License Agreement.

Indeed, the script is very useful as a guideline, but using it directly is pretty much impossible.   The script is obviously generated by another script, which isn't provided.  Everywhere, very long and specific full path names are embedded.  Custom versions of gcc, which aren't provided, are used by the script.  Those Mentor trademarks are also embedded in many places.  There's several sections compiling the proprietary components, which need to be removed.  You can read the script, but it's easier to write a new one than trying to run the one Mentor provides.

It took me any entire day's work to deconstruct this giant script.  The most time consuming part was learning the purpose of each pathname.  All the tools are configured with prefix set to "/opt/codesourcery".  However, the script never actually uses that directory.  The actual toolchain is installed to "/scratch/jbrown/arm-eabi/install", using an incredible amount of tedious work on every "make install" to override all the defaults based on prefix.  For quite some time, the word "scratch" confused me about the real purpose of that directory.  Lots of other stuff that actually is scratch (or temporary stuff) goes into "/scratch/jbrown/arm-eabi/obj" and similar directories.  For example, static libraries are built into "/scratch/jbrown/arm-eabi/obj/pkg-2012.09-63-arm-none-eabi/arm-2012.09-63-arm-none-eabi.extras/host-libs-i686-pc-linux-gnu/usr".  Making sense of all these directories is the key.  Then it's merely an extremely long build script....

After a couple days, I managed to recreate the entire script in a format similar to the widely used "summon arm toolchain" script.  For compiling the Linux version on Ubuntu 12.04, I was able to resolve pretty much every problem in my script by just looking at exactly what options CodeSourcery used.


GMP Check Problems

Of course, the first person I shared the binary with could not use it.  His system was an older version of Fedora, which had an older version of the libc.  So I used a virtual machine with Ubuntu 10.04 to compile the code.  That's where the problems began!

The first error was in GMP, the GNU Multiple Precision Arithmetic library.  All recent version of gcc use this library.  After you compile the library, it prints this helpful message.

+-------------------------------------------------------------+
| CAUTION:                                                    |
|                                                             |
| If you have not already run "make check", then we strongly  |
| recommend you do so.                                        |
|                                                             |
| GMP has been carefully tested by its authors, but compilers |
| are all too often released with serious bugs.  GMP tends to |
| explore interesting corners in compilers and has hit bugs   |
| on quite a few occasions.                                   |
|                                                             |
+-------------------------------------------------------------+

Of course, I included a "make check" in my script.  It ran without any error in Ubuntu 12.04, but failed with these errors on 10.4 in the virtual machine:

mpz_inp_str nread wrong
  inp         "0"
  base        10
  pre         0
  post        1
  got_nread   0
  want_nread  1
/bin/bash: line 5: 10113 Aborted                 ${dir}$tst
FAIL: t-inp_str
.........................
t-io_raw.c:102: GNU MP assertion failed: ! ferror(fp)
/bin/bash: line 5: 10223 Aborted                 ${dir}$tst
FAIL: t-io_raw
.........................
======================================================================================
2 of 59 tests failed
Please report to gmp-bugs@gmplib.org, see http://gmplib.org/manual/Reporting-Bugs.html
======================================================================================

Searching for the text of these errors turns up lots of web pages and email list conversations, with no useful answers.  That's why I'm writing this blog post, with the actual messages and explanation about what causes them and how to work around them.... so hopefully anyone hitting these errors will (hopefully) find this info.

At first, not finding any info about bugs in GMP or workarounds for these issues, I concluded it must be some bug in the compiler that was present in Ubuntu 10.04 but fixed by 12.04.  I installed another virtual machine with 10.10, with the same result.  Then 11.04, and then 11.11.  It seemed the problem must have been fixed between 11.11 and 12.04, since 12.04 running on my machine produced no errors.  For the sake of completeness (and also because I'd been up all night installing virtual machines, to the point Robin was about to wake up soon), I kept going to tried 12.04 in a virtual machine.

Ubuntu 12.04 failed GMP's "make check" inside VirtualBox, but passed the same check running natively!  Then I tried running those 2 specific test programs manually.  The copy compiled inside VirtualBox passes when run natively, but fails when run within the virtual machine.

Again, I searched on google, trying dozens of different queries with fragments of the error messages, virtualbox, ubuntu 12.04 and many, many other seemingly relevant terms.  It's a reoccurring theme of GNU toolchain compile errors.... searching for pretty much any error always turns up at least a few people asking for help with that exact error message, but rarely is there ever any useful reply (in fact, most have no reply at all).

So I started digging into the t-io_raw.c and t-inp_str.c code, adding lots of printf() statements and looking at the test files they write with a hex editor.  It turned out, the file was indeed longer than it should have been when running inside virtualbox vs running natively.  Adding "truncate" to more google searches finally led to VirtualBox bug #9485.

https://www.virtualbox.org/ticket/9485
https://forums.virtualbox.org/viewtopic.php?f=3&t=44056

Indeed, the GMP tests use fopen(filename, "w+") to truncate the file back to zero bytes, before writing new test data.  Knowing this was the problem, I added remove(filename) in front of each fopen(filename, "w+).  There were several more places this occurs in the GMP tests.  See my patches attached at the end of this message for the full solution.


More VirtualBox Trouble

Unfortunately, another ugly VirtualBox bug stopped the build process.  At least this one was easy to figure out.  Here's the error:

The directory that should contain system headers does not exist:
  /home/paul/teensy/arm_compile/arm-none-eabi/arm-none-eabi/usr/include

The previous steps did indeed build and install the libraries.  But the "usr" part of that pathname is apparently required by something inside GCC's build process.  Mentor's script (and mine by the way of copying Mentor's steps) creates a symbolic link before the final gcc build, so it will find the library headers.

When I looked at the files, the symbolic link simply wasn't there!

It turns out, this is another VirtualBox bug, number 10085:

https://www.virtualbox.org/ticket/10085#comment:14

Apparently when using shared folders, when you create a symbolic link, the link can point to locations on the host's filesystem which the guest in the virtual machine should not be able to access, because they may be outside the shared folder.  Obviously the VirtualBox people never thought carefully about how to implement symbolic links.  When it was reported as a security vulnerability, they just disabled it.

Fortunately, you can reenable symbolic links in shared folders using VBoxManage.

VBoxManage setextradata VM_NAME VBoxInternal2/SharedFoldersEnableSymlinksCreate/SHARE_NAME 1

Obviously, substiture the machine name and share name for VM_NAME and SHARE_NAME.

This episode has really shaken my confidence in VirtualBox.  Many years ago, before VirtualBox, I purchased VMware Workstation (I believe it was version 2 or 3).  Sadly, VMware doesn't update their kernel driver, unless you pay for expensive upgrages.  Other people updated the driver, but it became quite a chose to constantly search for unofficial kernel sources.  When VirtualBox came along, I dumped my ancient VMware... even though that very old version greatly outperformed VirtualBox.

If anyone from VMware reads this, I'm seriously considering buying Workstation again.  Really, it's not the cost that concerns me, but rather it breaking every time Ubuntu publishes a kernel update.  I had such a painful experience, long-term, with that old version of Workstation constantly breaking with each kernel update.  I depend upon being able to compile and test code in virtual machines... and usually it's an urgent need like a customer has a problem I need to reproduce.  I depend on the shared folders to quickly access code and files.

I really need to find a more reliable and dependable virtual machine....


CLOOG Library on Mac OS-X

With Linux working (and my script implementing everything Mentor did), I turned to compiling for Macintosh.  I was relieved when GMP passed, but this problem compiling CLOOG quickly turned up:

ld: library not found for -lgcc_s

As usual, searching for the error and combinations of related terms finds pages with the same problem (or at least similar errors), but no solutions.

However, I did find this page, which references a makefile written by James Snyder.

http://gnuarmeclipse.livius.net/wiki/Toolchain_installation_on_OS_X

James obviously deconstructed Mentor huge build script and created a nice makefile.  However, it's for an older version of the tools, before the CLOOG library was used.  James did use a small patch to run bash instead of sh.  Apparently something in gcc's multilib build depends upon bash.  I used James's patch, and it's included in the set attached to this post.

Thanks James!  :-)

For CLOOG, It didn't take much digging to find the libgcc_s.a is named slightly differently by Apple.

It turns out, CLOOG's configure script has a check for compiling on OS-X, to use the correct name, but it doesn't work because it checks for a specific (and old) version.  Here's the code:

        LIBS="$LIBS -lppl_c -lppl -lgmpxx -lstdc++"
        if test x$host_alias = xi686-darwin8; then
            LIBS="$LIBS -lgcc_s.10.4"
        elif test x$host_alias != xi686-mingw32; then
            LIBS="$LIBS -lgcc_s"
        fi

On my late-2011 MacBook running Lion (10.7) and Xcode command line tools 4.5.2, host is "x86_64-apple-darwin11.4.2", not "i686-darwin8".  I actually created a much more general patch, which is included in the file attached to the blog post.


Another GMP Check Issue - Windows

I've always felt a little intimidated by Canadian cross compiling, which means compiling a compiler that will run on another system, producing code for yet a 3rd system.  The GNU toolchain calls "build" the system you're using the build the tools, "host" the system where those tools will run, and "target" the system that will execute the compiler's output.  But standing on the CodeSourcery giant's shoulder (or at least their giant example script), I decided to give Canadian cross compiling a try.

Right away, I ran into another GMP check failure.

t-scanf.c:1497: GNU MP assertion failed: ret == (-1)

abnormal program termination
FAIL: t-scanf.exe

Having learned from the VirtualBox problems, I copied the executable to an actual Windows machine.  Sure enough, it runs without error on real Windows, but fails in Wine.

For this one, spending time trying google searches actually paid off!  I found this message from Rick Jones at RedHat, which explains the problem and provides a patch.

http://gmplib.org/list-archives/gmp-devel/2009-January/000817.html

This patch is included in the archive attached to this blog post.


MAKE for Windows

I decided to try building GNU make for Windows and Mac, since Microsoft and Apple don't provide it with their base system.

glob.c:76:18: error: pwd.h: No such file or directory
glob.c: In function ‘glob’:
glob.c:681: warning: assignment makes pointer from integer without a cast
glob.c:684: error: dereferencing pointer to incomplete type
glob.c:765: warning: assignment makes pointer from integer without a cast
glob.c:768: error: dereferencing pointer to incomplete type
make[2]: *** [glob.o] Error 1

I spent quite a lot of time searching for this error with related keywords.  I found a few threads, and one gave a solution for the first error (adding a #ifdef check for __MINGW32__).

http://lists.gnu.org/archive/html/make-w32/2003-04/msg00006.html

I started digging through the code, finding all the places with WINDOWS32 and adding the check for __MINGW32__.  Then I grepped the files in other directories and found many more WINDOWS32 checks.  I knew this wasn't a good path, so I started looking at why WINDOWS32 wasn't being defined for my cross compile.

Inside make's configure script, mingw is checked like this:

case "$host" in
  *-*-mingw32)

The mingw cross compiler I'm using is the package from Ubuntu, which has host string "i586-mingw32msvc", that doesn't match this check (only 1 dash character).  A simple patch to allow make's configure to recognized Ubuntu's mingw magically made everything work!


GCC, MinGW and caddr_t

The next problem was in compiling gcc.  There's something disheartening about gcc compile errors.  Any error is bad enough.  Even a relatively small package like GMP has hundreds of source files, but gcc.....

In fact, I had to scroll up the window and sift through many lines just to see the error.  At this point, gcc's build appears to be nested at least 4 or 5 makefiles deep!  Here's the actual error:

In file included from /home/paul/arm/native/bin/../lib/gcc/arm-none-eabi/4.7.2/../../../../arm-none-eabi/include/stdio.h:46:0,
                 from /home/paul/arm/workdir/gcc-4.7-2012.09/libgcc/../gcc/tsystem.h:88,
                 from /home/paul/arm/workdir/gcc-4.7-2012.09/libgcc/crtstuff.c:62:
/home/paul/arm/native/bin/../lib/gcc/arm-none-eabi/4.7.2/../../../../arm-none-eabi/include/sys/types.h:126:16: error: expected identifier or '(' before 'char'

The actual code at line 126 in types.h was this:

typedef char *  caddr_t;

I spent quite a bit of time trying to understand how something so simple could be an unexpected identifier before "char".  How could "typedef" be an unexpected identifier.

Searching on google, using lots of different combinations of keywords, turned up numerous people encountering similar problems, but few useful leads.  Ultimately I ended up grepping all the gcc files for "caddr_t" until I found this suspicious code in gcc/configure:

ac_fn_c_check_type "$LINENO""caddr_t""ac_cv_type_caddr_t""$ac_includes_default"
if test "x$ac_cv_type_caddr_t" = x""yes; then :

else

cat >>confdefs.h <<_ACEOF
#define caddr_t char *
_ACEOF

fi


Indeed, that was turning the perfectly reasonable "typedef char * caddr_t" into "typedef char * char *".  Not good.

Also not good is why.  Some investigating shows the check runs the mingw compiler to learn if its headers define caddr_t.  If the code doesn't compile, then the #define is added to confdefs.h.  That's great for compiling gcc itself.  But clearn confdefs.h is being intermingled with newlib's headers.  I don't know if this is a bug in gcc, or just somehow I haven't probably specified build, host and target (I did pass them all and much more to the top-level configure).

Anyway, the solution (or ugly hack) was just to comment out that #define line.  It's in my patch collection attached to this post.
 

Multilib Problems

With all these tweaks, the toolchain compiles on every platform.  But it produces non-working programs!

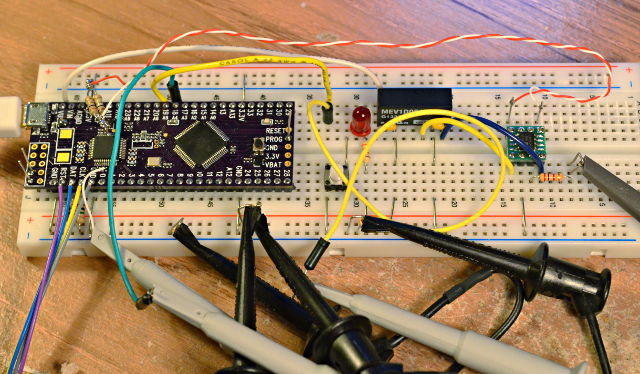
However, the same LED blink test program did work with CodeSourcery's published binary copy.  So I used arm-none-eabi-objdump -d to disassemble each one, and then I manually compared their generated assembly language code.

It turned out my build was including 32 bit ARM instructions for certain library functions, not the 16/32 bit Thumb2 instructions that CodeSourcery was properly including.  They had configured multilib differently.

This command prints a summary of the compiler's multilib setup.

arm-none-eabi-gcc -dumpspecs | grep -A1 multilib:

If you get what looks like a correct compiler, but non-working programs, maybe this will help?

After much digging, I tracked the problem down to the file "t-cs-eabi-lite", which is used due to the configure option "--enable-extra-sgxxlite-multilibs".  I'm not 100% of the cause of the error, but it seems like perhaps the file provided might not actually be the same as what they used when compiling their toolchain?

Anyway, since I'm building a toolchain targeting only 1 board, I just hacked this file up horribly to target only the hardware I need.  My t-cs-eabe-lite file is in the archive, but I was warn you not to use it, unless you intend to build a limited toolchain.  Perhaps I'll revisit this file (or maybe someone will leave a comment with improvements).  At least this message might help you get to the cause of wrong architecture code being linked, rather than go through so much trouble to successfully compile and only have the resulting output not work.


Contacting Me... "Thanks", not "Tech Support"

I took several hours to write this lengthy blog post, recreating each problem in each environment to get the exact errors, so you dear reader might have better luck with google, or whatever search you use, to find these solutions.  Throughout this project, finding others with the same errors has been easy, but solutions seem rare.  Hopefully this blog post will help a bit?

Also, it's meant to give fellow Dorkbotters (in the unlikely case they have time read this) a glimpse into this process and what I've been up to.  Perhaps it might help me too, if I later need to figure out why I created these patches.

I'm pretty easy to find if you search for Paul Stoffregen.  Please, if you do contact me, say "thanks".  DO NOT ask me for technical support with the GNU toolchain, particularly compiling it.  If it doesn't compile or doesn't work, and you can't find the answer online (pretty much my experience for most errors), you're going to have to dig into the code and figure it out yourself.  Hopefully this message might give you some insight.

The several hours I've spent composing this message are as much as I can help you with GNU toolchain compile issues.


AttachmentSize
pauls_gnu_toolchain_patches.zip4.66 KB

OctoWS2811

$
0
0

Last night I released OctoWS2811 ... after spending pretty much all Sunday making this 3 minute video:

Everyone at the meetup a couple weeks ago saw this right when it was first showing video.  Since then, pretty much all the work has been on the documentation and minor code improvements.

Big 7-Segment Countdown Timer

$
0
0

A few months ago I was feeling inspired to create a nice countdown timer.  With the next Dorkbot open mic only days away, I finally had the motivation to actually put it together...

Click "Read more" for photos, source code, schematic and other info.

Here's what the back side looks like....

The green buttons starts & stops the countdown.  The 2 blue buttons add or substract 1 minute.  It's a very simple and minimal user interface!


Here's a rough schematic for the whole project.  Well, except I left off the 7805 regulator and maybe some other mundane stuff, but this is pretty close.

The main challenge was driving the LEDs with a constant current, because they need about 10.5 volts across the several series LEDs.  I wanted to run from 12 volts, so there wasn't much voltage left over for the normal current limiting resistors.  Instead, I used this opamp circuit.

(edit: opps, I wrote LM358A on the schematic, but it's actually a LM324A opamp.  Really, they're the same, just 2 vs 4 per package... so you could use either if you try to build this on your own board, but if you use the PCB files below, get a 14 pin LM324A opamps)

The project runs from a Teensy 2.0.  The code is very simple, using the SPI and Bounce libraries for the hardware interfacing.

#include <SPI.h>
#include <Bounce.h>

// pins//  0 - Latch//  1 - Clock//  2 - Data//  4 - Enable (low=on)//  9 - Dots (high=on)Bounce button1 = Bounce(10, 12);
Bounce button2 = Bounce(23, 12);
Bounce button3 = Bounce(22, 12);

uint8_tmin=5;
uint8_t sec=0;
uint8_t unused_pins[] = {3,5,6,7,8,11,12,13,14,15,16,17,18,19,20,21,24};

voidsetup()
{
	for (uint8_t i=0; i < sizeof(unused_pins); i++) {
		pinMode(i, OUTPUT);
		digitalWrite(i, LOW);
	}
	pinMode(10, INPUT_PULLUP);
	PORTC |= 0x80;
	pinMode(22, INPUT_PULLUP);
	pinMode(23, INPUT_PULLUP);
	digitalWrite(4, HIGH);
	pinMode(0, OUTPUT);
	pinMode(1, OUTPUT);
	pinMode(2, OUTPUT);
	pinMode(4, OUTPUT);
	pinMode(9, OUTPUT);
	digitalWrite(0, LOW);
	digitalWrite(1, LOW);
	digitalWrite(2, LOW);
	digitalWrite(4, HIGH);
	digitalWrite(9, LOW);
	SPI.begin();
	update();
}

uint8_t sevenseg[10] = {
	// gfedcba
	0b00111111, //  aaa
	0b00000110, // f   b
	0b01011011, // f   b
	0b01001111, //  ggg
	0b01100110, // e   c
	0b01101101, // e   c
	0b01111101, //  ddd
	0b00000111,  
	0b01111111,  
	0b01101111  
};

voidupdate(void)
{
	if (min> 99) min == 99;
	if (sec > 59) sec = 59;
	SPI.transfer(min>= 10 ? sevenseg[min/10] : 0);
	SPI.transfer(min> 0 ? sevenseg[min%10] : 0);
	SPI.transfer(sevenseg[sec/10]);
	SPI.transfer(sevenseg[sec%10]);
	delayMicroseconds(2);
	digitalWrite(0, LOW);
	delayMicroseconds(2);
	digitalWrite(0, HIGH);
	digitalWrite(9, HIGH);
	digitalWrite(4, LOW);
	delayMicroseconds(5);
	digitalWrite(0, LOW);
}

elapsedMillis count = 0;
uint8_t running = 0;

voidloop()
{
	button1.update();
	button2.update();
	button3.update();
	if (button1.fallingEdge()) {
		Serial.println("button1 - Start/Stop");
		if (running) {
			running = 0;
		} else {
			running = 1;
			count = 750;
		}
	}
	if (button2.fallingEdge()) {
		Serial.println("button2 - Add 1 minute");
		if (min< 99) {
			min++;
			update();
		}
	}
	if (button3.fallingEdge()) {
		Serial.println("button3 - Subtract 1 minute");
		if (min> 0) {
			min--;
		} else {
			sec = 0;
			running = 0;
		}
		update();
	}

	if (running && count >= 1000) {
		count -= 1000;
		if (sec > 0) {
			sec--;
		} else {
			if (min> 0) {
				min--;
				sec = 59;
			} else {
				running = 0;
			}
		}
		update();
	}
}

The 7 segment displays were something I'd purchased from an E-bay merchant about a year ago.  I can't find then anymore, which is sad because they were really cheap.

I actually created this PCB only days after the last Dorkbot open mic.  Here's a photo of the board.


There's actually quite a few parts on the board.  Here are the placement diagrams:

I'll attach the PCB gerber files.  I also have 2 extra boards left over, which I'll toss in the Dorkbot free parts pool.  If anyone grabs them for a real project, hopefully this info will help.


AttachmentSize
big7seg.zip10.59 KB

Teensyduino Regression Testomatic, 1st Try...

$
0
0

Over the last couple weeks I've been working on a automated test system for Teensyduino, which someday will verify nearly all the Arduino functionality on every board and also test most of the Arduino libraries.  Here's what my first try looks like.

Click "Read more" for another photo, a bit of discussion about how this works (and what doesn't work so well), and a peek at what will be my second attempt.

The main idea, which began in November 2012, behind this test is the use of AD75019 switch matrix chips to allow the control board (on top) to configure which pins on the other 3 boards (the test boards, each with a different Teensy) connect to each other and to various peripheral hardware.

Here's a peek inside....

The switch matrix chips provide a 16 signal bus.  Any pins from any of the test devices and some peripherals on the top board can be connected to any of the 16 signals.

At first, I started building on the (now abondoned) ArduinoTestSuite project started by Mark Sproul, Matthew Nurdoch, and Rick Anderson.  A good number of the tests were ones I wrote and contributed while debugging the Arduino String functions, plus a couple others.  Sadly, that code is filled with AVR-centric design that doesn't play nicely with Teensy 3.0.  There's a tremendous amount of complex code just for printing stuff, and it's in a style I don't like with complex naming conventions for even the simplest things!  I ended up pulling out the String and pulseIn test I wrote, and modeled some of my new tests after theirs, but none of the original code has remained.  It was just easier to rewrite everything in a much simpler way.  But their work was tremendously helpful as a starting point and inspiration for this project.  Rick, Mark, Matt... if you're reading this, thanks.  :-)

One of my goals with this design was to create a multi-board test.  In ArduinoTestSuite, the paradigm is the code runs on a single board and prints messages about success or failure.  For testing something like Tone, this model works pretty well.  The tone is created in the background by interrupts, while the main program rapidly polls the signal with digitalRead().  The hardware requirement is simple, just 2 pins connected together (or with the switch matrix, those 2 pins both connected to 1 of the 16 bus signals).

However, the single board approach is pretty limited.  For example, testing delay() with this code is pretty pointless.  Since delay() and millis() are implemented by the same software, very few types of defects would be detected by this single board test.  I wrote a 2-board delay test, where the first board uses digitalWrite() with a delay(), and the second board measures the actual delay with digitalRead() and micros().  A future version might use timer hardware for higher accuracy, but even software polling works very well.  The test runs twice, once with an AVR-based Teensy 2.0 sending and a ARM-based Teensy 3.0 receiving, and then vise versa.  They're different processors and different code bases.... so if a regression happens someday causing delay() to break or become inaccurate, hopefully only 1 will break, or they might break differently, but much better odds of automatically detecting the defect.

Currently, the control board implements 5 simple text-based commands, a few to configure the switch matrix, one to configure which Teensy is "active" (more on that in a moment), and a command to reboot the active Teensy, which causes it to be reprogrammed.

So far, the software side on my PC is very simple.  I back-ported Arduino 1.5.2's command line inputs to 1.0.4 (any copy of Arduino modified by Teensyduino has this).  A makefile just runs Arduino to compile the code.  Teensy Loader supports a programming mode where you use Verify in Arduino, which causes the Teensy Loader to update with the freshly compiled code, and the you press the button to reprogram.  After Arduino compiles the code, the makefile runs a program to send the commands to the control board, which configure the switch matrix and reboots the Teensy to run the test.  Then after a 1 second delay, another program waits for that Teensy to come online, captures its Serial.print() output and parses for a message indicating success or failure.

Each single board test is 3 components: the .ino program which does the test and prints success or fail (and optionally info as it does the test), the script to send to the control board causing the switch matrix to be configured, the desired test Teensy selected and rebooted, and the makefile to compile, send the script and run the result capture.  Each test has its own tiny makefile.  A master makefile just runs them all.  If any step anywhere fails, make stops the "build".  It's all just relatively simple makefiles to compile the code, configure the hardware to start the test, and capture the result.  Some day this might integrate with a fancy system like Jenkins, but for now I'm focused on just keeping it all very minimal makefile which I continue to develop.

The active board command selects which of the board will receive all the other commands.  It's a very simple system.  One key component is a USB disconnect switch.  The control board is always connected.  Only one of the other boards can connect to USB.  I put FSUSB30 switches on each board.  If you look at the photo above, you'll see a pair of wires soldered from each Teensy's USB to the test board, so the USB goes through those FSUSB30's to allow the control board to connect only the active Teensy.

The 2-board test was a challenge.  It turned out to be somewhat difficult to get the transmitting board, which is programmed and boots up first, to reliably wait until the receiving board is read for the test signals to begin.  After much frustration with simple high-low or low-high transitions, I ended up building something that's probably overkill, but works very reliably.  A sequence of high-low, low-high transitions is sent with distinctive timing.


void RegressionTestClass::sendSignal(uint8_t pin)
{
        digitalWrite(pin, HIGH);
        pinMode(pin, OUTPUT);
        digitalWrite(pin, HIGH);
        delayMicroseconds(6000);
        digitalWrite(pin, LOW);
        delayMicroseconds(1700); // 3 distinctive pulse widths, very unlikely
        digitalWrite(pin, HIGH); // to occur randomly while boards reboot
        delayMicroseconds(3900); // or the switch matrix is reconfigured
        digitalWrite(pin, LOW);
        delayMicroseconds(4700);
        digitalWrite(pin, HIGH);
}
 

The receiver waits for this sequence, with some tolerance in the timing, but it must match very closely:


void RegressionTestClass::waitForSignal(uint8_t pin)
{
        elapsedMicros usec;
        unsigned long t1, t2, t3;

        pinMode(pin, INPUT_PULLUP);
        while (1) {
                //Serial.println("begin waitForSignal");
                while (digitalRead(pin) == LOW) ; // wait
                while (digitalRead(pin) == HIGH) ; // wait
                usec = 0;
                while (digitalRead(pin) == LOW && usec < 1850) ; // wait
                t1 = usec;
                //Serial.print("t1=");
                //Serial.println(t1);
                if (t1 < 1600 || t1 >= 1850) continue;
                while (digitalRead(pin) == HIGH && usec < 5900) ; // wait
                t2 = usec;
                //Serial.print("t2=");
                //Serial.println(t2);
                if (t2 < 5500 || t2 >= 5900) continue;
                while (digitalRead(pin) == LOW && usec < 11000) ; // wait
                t3 = usec;
                //Serial.print("t3=");
                //Serial.println(t3);
                if (t3 < 10200 || t3 >= 11000) continue;
                return;
        }
}
 

With this signalling in place, building the 2-board test became fairly easy.  It has 5 components: the 2 .ino files for the sender and receiver, the 2 control board scripts to cause each to be programmed and of course configure the switch matrix to route the signals between the boards, and the makefile to run the commands.


However, as I've worked with this, one pretty serious limitation has come up.  The AD75019 switches are about 200 ohms on resistance.  I'm powering it with 12 volts.  24 volts apparently gives about 150 ohms, but that's only a small improvement.

The problem is this design has a lot of capacitance on those 16 shared bus signals.  The run through that ribbon cable to every board, and on each board to 2 or 3 of the switch matrix chips.  The wires on each board between the Teensy and the switch matrix aren't short either, since the board has places for 3 different Teensy boards, so they add some capacitance.  To route any signal between 2 points, it has to go through a 200 ohm switch to one of the bus signals, then through another 200 ohm switch driving a lengthy wire at the destination.

The result is about 2 MHz bandwidth.  That works great for many types of tests, but for SPI-based tests like the Ethernet and SD library, it's a real problem.

It turns out the Teensy 3.0 test on Ethernet can just barely work, because it's sending 3 volt signals and the W5100 chip is looking for 3 volts.  The SCK clock looks pretty terrible... pretty much a triangle wave with curved slopes, but it just barely works.  But a 5 volt signal bandwidth limited ends up spending too much time high when received by the 3 volt (but 5V tolerant) ethernet module.  I got an Ethernet test to work by configuring the Teensy 2.0 to run at 8 MHz.  So far, I haven't been able to make the SD library test work at all.

Over the last few days I've been considering many other options.  I designed a bigger version of this board with a couple old SpartanXL FPGAs I have left over from the ancient MP3 player project (from long before Apple sold their first iPad).  Those old FPGAs are 5 volt tolerant, which is important.  The board grew in size and had to grow to 4 layers to route, and since this basically adds yet more stuff, it probably increases the capacitance problem even more.  I did a preliminary design for a big digital mux similar to the switch matrix, but not bidirectional like the analog switches, really unidirectional 2 ones in the same chip.

I was about to send this board to fab, but then had a lot of second throughts.  One big one was the Xilinx software said the pad-to-pad timing was 20 ns.  That's not bad, but this design required the signal to go through 2 of those paths, so 40 ns from the Teensy to the SD card.  Then the MISO signal goes through 40 ns to get back.  I orginally has reservations about the analog switches being too slow, but I just wanted to get the project started.  Now I had this feeling again.....

So of course I redesigned everything!

I had a epiphany that a single test system didn't need to cover every possible scenario.  Simple, right?  Well, I had designed a mostrously complex 4 layer board to add those FPGAs, and even that might not be good enough.  So instead, I started work on a fast digital-only board.  Rather than make a shared bus that's extremely flexible and expandable, I just went with connecting every pin from the 3 test boards to a FPGA I/O pin.  Reconfiguring the FPGA can serve to route the signals.  I'm not going to implement a big switch matrix (I did draw up a design... it's a huge monster), but rather keep things extremely simple and do a new FPGA configurations for each test, which will probably be a trivial schematic with just a few buffers connecting one FPGA pin to another.  That can get the delay into the 10ns range.

I also discovered Xilinx made one more generation, the Spartan2, which is 5 volt tolerant.  Luckily, they're still readily available.  Xilinx has long since dropped support for those chips from their software.  The don't publish old versions.  But as luck would have it, I still have the original Foundation 3.1 software and even a service pack they published plus a disc with the documentation of that era (none of these things are still available from Xilinx).

So, here's my next attempt, which was sent to fab yesterday.

It's got the 3 Teensy boards with every digital pin connected to a FPGA pin.  12 signals go to 2 different ethernet modules and a SD card, and 17 signals go to header that I'll use to connect other peripherals as I expand my testing to cover more Arduino libraries.

The key point though, is this high speed digital board is only needed for the tests that can't run on the stack of boards with the more flexible analog switch matrix.  The analog switches are really very nice, despite the limited bandwidth, because they're bidirectional and, well, analog.

Over time, I intend to develop automated tests for all the standard Arduino functionality and probably most of the Arduino libraries officially supported on Teensy.  That list of libraries will probably double over the next year too, since I have a big box of purchased hardware sitting right here.  I plan to start incorporating them into this automated testing as much as I reasonably can.

Hopefully over the long term, this effort will really improve the code quality of Teensy's support for Arduino usage.  It might also really benefit regular Arduino users too.  Already with only just 6 tests implemented, I've discovered a couple bugs, one of which appears to also be in Arduino 1.5.2 for Arduino Due.  I'm planning to contribute a fix to them soon.

I'll probably post more here as this system develops.  If anyone is interested (or if anyone actually read all this), please let me know in the comments below?  Also, before anyone asks about fancy Continuous Integration systems, see my note above about keep this as simple as possible while developing the basic system.


Unix Select-Paste in Arduino Editor

$
0
0

The Arduino IDE editor's lack of support for X11's select-paste mechanism has always annoyed me.  Well, I finally got around to adding it.  Especially for helping people with their Arduino troubles (which I do every day), it's so very nice to finally be able to quickly select-paste between Arduino and forum messages, email, terminal windows, etc.

This is a Unix/X11 feature.  Mac & Windows do not have anything similar.  But on Linux it's so very fast and convenient.  This tiny little feature really makes me happy.  :-)

Update: it's been accepted and will become part of Arduino 1.0.5.  Anyone using 1.0.4 who wants this feature now can install Teensyduino 1.0.4 release candidate #1 to get this feature without having to recompile the entire Arduino IDE.

Maker Faire 2013

$
0
0

The Dorkbot booth at Maker Faire worked out really well.  Here's a couple good photos Zach took:

This is the right-hand side, with my extremely bright OctoWS2811 Arduino library demo triggered by stomp pads.

This is the center with Tom's Bee counter, Zach's Hypnolamp, and Tara's soldering demo in the center, viewed over the top of Jared's VFD display spectrum analyzer (and FPGA Robotron not visisble in this photo).

Click "Read more" for more pictures, source code and other stuff

During the Faire, Jason Kridner from Texas Instruments came by to see my use of the new Beaglebone Black.  He recorded this quick video interview about the project, and posted in on his blog.

http://www.youtube.com/watch?v=d-Vbtg_6yRg


Getting things ready for the DorkbotPDX exhibit at Maker Faire.....


(everything below this point was written a few days before Maker Faire)


I originally published the OctoWS2811 library in February with an example that plays video using a program written in the Processing environment.


For this project, I decided to attempt streaming live video and also overlaying animated GIF images triggered by user input.  Originally I had planned to use Processing again, but with the Beaglebone Black was released, I couldn't resist the opportunity to make it run on such a tiny little Linux board.

Here's a block diagram of the system.  It's from the printed handout (PDF in the files below) I'll have for people at Maker Faire.

The Beaglebone runs this project easily, using about 30% CPU while the video is streaming and GIF files are triggered.  I used the efficient video4linux API, via the v4l2 library (which is installed by default on Beaglebone's Angstrom Linux distribution).

I also used libudev to detect the attach and remove events for the webcam and the USB virtual serial devices from the Teensy boards.  Each board implements a very simple identification query/response, so when udev detects each serial device, it sends the query and parses the response.  This completely avoids hard-coding any device names.  The complete source code is available below, for anyone who wants to use this technique.

Not all has been perfect with Beaglebone.  The main problem has been its poor detection of USB devices connected to its host port.  This post about a musb bug was the best info I found.

Leave your usb hub connected with at-least one device plugged in at
ALL times from the moment you powered it up..

However, this wasn't the only issue.  The Beaglebone Black just can't see some hubs reliably.  Here you can see a bracket I built for a smaller hub which works great on 2 PCs and 1 Mac I tested, but the Beaglebone Black almost never detects it (as if nothing were plugged into its host port).  But it can use this somewhat-larger hub (so now I need to make an bigger mounting bracket).  I'm hopeful future Beaglebones will ship with this problem fixed, but it is something to consider for anyone attempting these sorts of projects using the USB host port.

I should mention I also tried using a Raspberry Pi.  The uvcvideo driver (for the webcam) exists and works on the Pi, but it drops most of the frames.  The resulting frame rate is only a few per second.  It's utterly unusable.  I found numerous threads where people had similar issues on the Pi, without solutions, other than anticipating the native camera.  I found discussions saying some older versions might have a better driver, but I tried several and all were terrible.

On Beaglebone, this Logitech 9000 webcam works great with uvcvideo.  The default Angstrom Linux doesn't have the driver, but it's a simple matter to add it with "opkg install kernel-module-uvcvideo_2.6.39-r102o.9_beagleboard.ipk".  I found this on their website, and I'll attach the file to this message, just in case.

The LEDs are the same 1920 array (60 by 32) I used previously for developing OctoWS2811.  I cut them out of the rubber tubing, because they run pretty hot for indoor use inside those tubes.

Of the 1920 LEDs I purchased from Ray Wu on Aliexpress, 5 have died.  Originally it was only 1 dead pixel and 2 more that would stop working after an hour or two of use.  Here you can see one of the LEDs which was replaced.  I hoping no more die at Maker Faire, but if they do I'll be prepared to cut them out and solder in repacement.

Here are the stomp sensors.  They're just Piezeoelectric speakers, Murata 7BB-27-4L0, taped and glued to cardboard and placed under Soft Tiles foam mat material.

The sensors are connected to an interface board that converts the analog voltage to digital signals using LMV393 voltage comparators.  The Arduino attachInterrupt() function is used to respond to the rising edges.  Teensy 3.0 supports attachInterrupt on all digital pins, so it's easy to connect lots of sensors to just 1 board.  There's a brief timeout after sending any output where additional triggers are ignored.  That helps prevent vibration from triggering the nearby pads.  The complete source code is available below in the attached files.


That's about it for now.  I have a long list of stuff to do before hitting the road tomorrow for San Mateo (including making a new bracket for the BB+Hub).  But the project is working pretty well.... well enough I can spend a bit of time updating this blog.

AttachmentSize
mf2013_handout.pdf89.3 KB
ledvideo_06.zip33.3 KB
beaglebone_uvcvideo.zip35.67 KB
stomp_pads_sketch.zip1.18 KB
ledvideo_07.zip34.12 KB
animated_gif_files.zip572.82 KB

AD75019 Crosspoint Analog Switch

$
0
0

On my post about the regression test set, jeppius asked if I had sample Arduino code for these AD75019 chips.

Click "Read more" for the Arduino code and details....

First, a bit of background.  The AD75019 has 256 bidirectional analog switches in a 16x16 grid.  The 256 switches can connect between any X and Y pin.  Here's the main diagram.  The full datasheet is attached below.

The chip is controlled by a big 256 bit shift register.  I just chained the 3 chips in tandem, so the shift register is 768 bits.

In the regression tester, I used 3 of these chips to allow any combination of the 48 signals (on the X pins) to connect to any of 16 signals (on the Y pins).  The 16 Y pins are connected as a 16 bit bus between these 3 chips, and the sets of 3 chips on the other boards in the tester.  This "anything to the 16 signal bus" approach is important for understanging the code.

Here is the Arduino code:

// pinout
#define SCLK_PIN	13
#define SIN_PIN		14
#define PCLK_PIN	15 // only to selected board, others are highuint8_t update_required=0;
uint16_t switches[48];

voidsetup()
{
	pinMode(SCLK_PIN, OUTPUT);
	pinMode(SIN_PIN, OUTPUT);
	digitalWrite(PCLK_PIN, HIGH);
	pinMode(PCLK_PIN, OUTPUT);
}

voidloop()
{
}

///////////////////////////////////////////////////////////////////////////   AD75019 Switch Matrix Control/////////////////////////////////////////////////////////////////////////// connect a Teensy pin (0 to 48) to a bus signal (0 to 15)voidconnect(uint8_t pin, uint8_t signal)
{
	uint8_t chip;
	if (pin < 16) chip = 32;
	elseif (pin < 32) chip = 16;
	elseif (pin < 48) chip = 0;
	elsereturn;
	if (signal >= 16) return;
	switches[chip + (15 - signal)] |= (1 << (pin & 15));
	update_required = 1;
}

void disconnectAll(void)
{
	memset(switches, 0, sizeof(switches));
	update_required = 1;
}

voidupdate(void)
{
	uint8_t i;
	uint16_t n, mask;

	for (i=0; i < 48; i++) {
		n = switches[i];
		for (mask = 0x8000; mask; mask >>= 1) {
			digitalWrite(SIN_PIN, (n & mask) ? HIGH : LOW);
			// 20ns setup required
			asm("nop");
			asm("nop");
			digitalWrite(SCLK_PIN, HIGH);
			asm("nop"); // sclk pulse width, 100 ns minimum
			asm("nop");
			asm("nop");
			asm("nop");
			asm("nop");
			asm("nop");
			digitalWrite(SCLK_PIN, LOW);
			asm("nop");
			// 40ns hold time required
		}
	}
	asm("nop"); // 65ns setup required
	asm("nop");
	asm("nop");
	asm("nop");
	digitalWrite(PCLK_PIN, LOW);
	asm("nop"); // pclk pulse width 65ns minimum
	asm("nop");
	asm("nop");
	asm("nop");
	digitalWrite(PCLK_PIN, HIGH);
	update_required = 0;
}

/*The first bit loaded via SIN, the serial data input, controls the switchat the intersection of row Y15 and column X15. The next bits control theremaining columns (down to X0) of row Y15, and are followed by the bitsfor row Y14, and so on down to the data for the switch at the intersec-tion of row Y0 and column X0. The shift register is dynamic, sothere is a minimum clock rate, specified as 20 kHz.Teensy pins connected to X0-X15 - signal are Y0-Y15*/

This code works with a copy of all 768 bits in memory.  The disconnectAll() function clears the entire in-memory array, and the connect() function writes a single bit to connect any of the 48 X pins to any of the 16 Y pins.

Those functions only modify the in-memory array.  To actually update the AD75019 chips, the update() function is used.  It writes all the bits to all 3 chips and pulses the latch clock, so all the switches change at the same moment.

That's pretty much all there is to it.  These chips are really nice and were probably meant to be used for routing audio signals (they can run from +/- 12 volts).  The only downside is the chip is expensive.


AttachmentSize
AD75019.pdf72.01 KB

USB Virtual Serial Benchmarks


DMX Lighting Sequence Player

$
0
0

Portland CORE effigy at Burning Man will be using DMX controlled lighting this year.  At least that's the plan, but a low-cost and low-power way to automatically play the lighting sequence (without a PC) is needed.  Here's a little board I made for the purpose.

Click "Read more" for source code and other technical details.

First, the lighting sequence is created using Vixen version 2.  Creating the sequence is pretty simple, just click ranges of time slots and use the toolbar buttons to turn the light on, off, fade up, fade down, etc.  Vixen has lots of little features to create patterns, but so far I've only used the simplest ones.

One nice feature of Vixen, which I knew existed but never tried back on the Hand-Eye Supply float (Tobias did most of the Vixen stuff) is the Sequence Preview.  It takes a photo of your project and then you can define pixels that will overlay the image for each lighting channel.  Here's a screenshot:

Vixen version 3 greatly expands the preview feature and adds lots of new features, but it doesn't use the simple time slots that we need from version 2.  Maybe someday I'll revist this project and make a way to use version 3, but for now it's limited to Vixen 2.

Vixen saves files to its Sequences folder as a ".vix" file.  It's XML format, with a big binary dump of the raw sequence data encoded as base64.  I started reading about Vixen's file format, determined to write a program to play it.  Pretty soon, I found Bill Porter had already done it, and written a very nice tutorial.

I just modified Bill's awesome script.  I've done very little with Python before, but it's a pretty easy language to pick up.  There are lots of tutorials and great documentation online.  But being a Python novice, I probably didn't do everything the best way.  At least it works.  Actually, it apparently only works with Python 2.7, but not Python version 3.  Again, I'm a Python novice....

It turned out Bill's script could not read a .vix file with the image preview.  It finds too many channels, because the channels within the preview get double counted.  Bill used Phython's minidom XML parser with getElementsByTagName() to find all the channels.  I found much better documentation for Python's ElementTree, so I rewrote the script using that to carefully find only the channels in the main section of the file.

I also changed the script's output.  Instead of creating a .cpp file to be compiled directly into Arduino, I had the script output a text file with the data in a format that could easily be read from a SD card.  This way, there's no practical limit to the sequence length.  The script stores the data in a simple format, so Arduino code can just read each line of the file as it plays the sequence.  Here's what the text format looks like:

100
000000000000000000000000000000000000FF000000000000000000000000000000000000000000
331700000000000000000000000000000000F9000300000000000000000000000000000000000000
662E00000000000000000000000000000000F4000600000000000000000000000000000000000000
994500000000000000000000000000000000EF000900000000000000000000000000000000000000
CC5C0E000000000000000000000000000000EA000C00000000000000000000000000000000000000
FF731C000000000000000000000000000000E5001000000000000000000000000000000000000000
FF8B2A000000000000000000000000000000E0001300000000000000000000000000000000000000
BFA238000000000000000000000000000000DB001600000000000000000000000000000000000000
7FB946000000000000000000000000000000D6001900000000000000000000000000000000000000
3FD055000000000000000000000000000000D1001C00000000000000000000000000000000000000
00E76300000080FF00000000000000000000CB002000000000000000000000000000000000000000
00FF710A00007BF605000000000000000000C6002300000000000000000000000000000000000000
00FF7F15000077EE0A000000000000000000C1002600000000000000000000000000000000000000

The first line is the number of milliseconds for each update period.  Then each line has channel 1 in the first 2 characters, channel 2 in the next 2 characters, and so on.

With the data in a simple format, it was pretty easy to write code with Arduino to read it.  The DmxSimple library did all the heavy lifting for transmitting DMX, so only a RS-485 chip needs to be connected to get DMX output.

The SD library and Arduino 1.0's new readBytesUntil() function makes reading the text file pretty easy.  Just a little code was needed to turn the hex digits back to binary.  I suppose I could have made the Python script output binary, but I felt the text file would be much nicer, so anyone using this project could "see" the data by just double clicking the file.

With 5 PWM output available (DmxSimple uses Timer2, so 2 of the 7 PWM on Teensy2 aren't usable), I added a tiny bit of code to display the first 5 channels on LEDs.  The script can parse up to 256 channels, half of DMX's maximum.  I'm pretty sure that will be plenty of this project.

Here's the Arduino sketch:


#include <SD.h>
#include <DmxSimple.h>

constint chipSelect = 0;
char buffer[516];

voidsetup()
{
  for (int i=0; i<NUM_DIGITAL_PINS; i++) {
    pinMode(i, INPUT_PULLUP);
  }
  analogWrite(4, 0);
  analogWrite(5, 0);
  analogWrite(9, 0);
  analogWrite(15, 0);
  analogWrite(14, 0);
  //Serial.begin(115200);  DmxSimple.usePin(10);
  DmxSimple.maxChannel(100);
  for (int i=1; i<=100; i++) {
    DmxSimple.write(i, 0);
  }
  // initialize the SD card  pinMode(LED_BUILTIN, OUTPUT);
  digitalWrite(LED_BUILTIN, HIGH);
  while (!SD.begin(chipSelect)) {
    delay(250);
  }
  digitalWrite(LED_BUILTIN, LOW);
}

voidloop()
{
  play();
  // TODO: would be nice to detect if the SD card is removed  // and automatically recover, rather than requiring power cycle
}

void play()
{
  File f = SD.open("COREPLAY.TXT");
  if (f) {
    // read the period so we know how fast to play    long period = f.parseInt();
    //Serial.print("Period is ");    //Serial.println(period);    f.readBytesUntil('\n', buffer, sizeof(buffer));
    
    // then read every line and play it    elapsedMillis msec=0;
    while (f.available()) {
      f.readBytesUntil('\n', buffer, sizeof(buffer));
      //Serial.print("Data: ");      //Serial.print(buffer);      int channels = hex2bin(buffer);
      //Serial.print(", ");      //Serial.print(channels);      //Serial.println(" channels");      if (channels > 0) {
        //transmit all the channels with DMX        DmxSimple.maxChannel(channels);
        for (int i=0; i < channels; i++) {
           DmxSimple.write(i+1, buffer[i]);
        }
        // display the first 5 channels on LEDs        analogWrite(4, buffer[0]);
        analogWrite(5, buffer[1]);
        analogWrite(9, buffer[2]);
        analogWrite(15, buffer[3]);
        analogWrite(14, buffer[4]);
        // wait for the required period        while (msec < period) ; // wait        msec = msec - period;
      }
    }
    f.close();
  }
}


byte hexdigit(char c)
{
  if (c >= '0'&& c <= '9') return c - '0';
  if (c >= 'A'&& c <= 'F') return c - 'A' + 10;
  return 255;
}


int hex2bin(char *buf)
{
  byte b1, b2;
  int i=0, count=0;
  
  while (1) {
    b1 = hexdigit(buf[i++]);
    if (b1 > 15) break;
    b2 = hexdigit(buf[i++]);
    if (b2 > 15) break;
    buf[count++] = b1 * 16 + b2;
  }
  return count;
}

I'm not actually going to Burning Man this year.  So far, my success rate for building stuff for burners to take and use on the Playa (in my absence) has been pretty low.  Burning Man is a really harsh environment and it's also filled will all sorts of distractions when solving any sort of technical problems.  This year the team has someone who's very good with electronics and he seems comfortable with Python.  Hopefully this little device will be usable and they'll be able to create sequences, convert the file and get it onto the SD card.

Anyway, here's all the info and the Python script, in case anyone ever wants to use it.


AttachmentSize
Vixen2core_python_script.zip973 bytes

Measuring microamps & milliamps at 3 MHz bandwidth

$
0
0

Recently I needed to actually "see" a current waveform in the 100 uA to 5 mA range with at least a couple MHz bandwidth.  This extremely expensive probe would have been perfect, but instead I built something similar for about $30 using the amazing Analog Devices AD8428 amplifier.

Click "Read more" for details and a scope screenshot....

The first step was cutting the power trace and adding a resistor.  I used two 1 ohm resistors in parallel.

At 5 mA, this makes only 2.5 mV.  My scope's supposed resolution is 1 mV, but the truth is there's plenty of noise down in the 1 mV range.  That's pretty common for most scopes, even pretty spendy ones.  So it's just not feasible to measure this signal directly (not to mention using 2 probes and subtracting them in the scope).

That incredibly expensive Agilent probe probably has a couple really nice amplifiers inside.... so I went searching for an amplifier.  After a bit of seaching, I found the AD8428.  It has a fixed gain of 2000 and a bandwidth of 3.5 MHz.  That's a gain-bandwidth product of 7 GHz !!!  It's also an extremely well matched instrumentation amp with an amazimg CMRR of 140 dB.  So it gets rid of the power supply voltage and outputs the amplified signal referenced to ground.

The AD8428 is perfect.  It's so very easy!  Of course, such amazing performance costs money: about $20.  Here's that expensive little amplifier, and a 5V to +/- 15V power supply (about $10) to power it.

The one trick with measuring such tiny voltages is twisting the 2 sense wires together.  Honestly, I didn't try it running them separately, but since this thing is getting voltages in only the microvoltage range for the lower measurements, I didn't want to risk picking up noise.  I also put a 100 ohm resistor on the output, just in case I accidentally short the output or do something clumsy that migth blow that little $20 part.

Here's a scope screenshot using this little amplifier to "see" the current (the blue waveform).

In this test, the microcontroller is running in its slowest mode at only 10 kHz, drawing about 120 uA.  Then when the chip's internal oscillator is started, the current jumps to about 600 uA.  Later, the CPU switches to actually clocking from that oscillator.  There's an on-chip clock divider which is switched in and increased gradually.

The bottom trace (red) is the voltage on the chip's 1.8V linear regulator.  It turns out that sudden jumps in current cause pretty substantial downward spikes on the regulated voltage.  This more gradual startup approach really helps.  This sort of thing is impossible to see with a slow multimeter, but with a reasonably good bandwidth measurement of the current, it's easy to see what various code actually does to the current.

I tried connecting my multimeter to the amp output.  Sometimes it's just a lot more convenient to look at a single number on a meter than fiddle with the scope.  I had been using the current mode on the meter before building this.  One thing I was surprised to find it my little meter updates its screen much faster while measureing about 125 mA than it does when measuring 125 uA.

Another interesting thing I've been noticing is patterns within the blue current waveform.  This Agilent scope has a "digital phosphor" rendering of the huge amount of data it collected.  This static screenshot can't really capture the interactive experience of adjusting the waveform intensity, where various regions within the data change brightness differently, indicating there's something interesting/different going on.  Even so, you can see several areas in the screenshot where interesting things are happening once the CPU is up and running.  It's interesting how the current waveform changes as different code executes.

I know this isn't anything terribly impressive... basically just buy a high-end amplifier and use it with a series resistor.  Maybe it even reads like an Analog Devices ad?  I'm not affiliated with Analog Devices... I just bought this part at normal qty 1 pricing from Digikey.

Still, this is the first time I've ever really looked at such low microcontroller currents with a few MHz bandwidth, and I'm guessing not many people have ever bothered to really measure such currents, so I thought I'd share.


Audio clip player

$
0
0

Yesterday I made a little audio clip player for a Monty Python Flying Circus theme party.  It plays the 3 second dramatic sound for the unexpected Spanish Inquisition entrance.

Click "Read more" for the schematic, source code and sound file....

The hardware is pretty simple.  It's just a Teensy 3.0 that "plays" the audio using a PWM pin.

The PWM is amplified to a 9V signal using a NPN transistor, then a pair of transistors buffer the signal to the current required to drive an 8 ohm speaker.

I had intended to make a nice L-C filter to remove the PWM carrier, but only the 100 uH inductor made it onto the breadboard as I quickly put this thing together in only a couple hours.

The source code is extremely simple.  Teensy 3.0 has the ability to configure its PWM frequency, so it's set to 187.5 kHz.

The audio is played by just reading each byte from a big array and updating the PWM with analogWrite(), repeating every 32 microseconds until all the data is played.

Two little chunks of code slowly ramp the PWM from zero to 0x80 (the "center" where zero is for the audio) before playing and back down again afterward, so there isn't a pop sound.

#include "spanish_inquisition.h"voidsetup()
{
	unsignedint i;
	elapsedMicros usec;

	analogWriteFrequency(3, 187500);
	analogWriteResolution(8);
 	// gracefully ramp up from 0 to 0x80 (dc bias)for (i=0; i < 0x80; i++) {
		analogWrite(3, i);
		while (usec < 120) ; // wait
		usec = usec - 120;
	}
	// play the audio data
	usec = 0;
	for (i=0; i < sizeof(file_spanish_inquisition); i++) {
		analogWrite(3, (file_spanish_inquisition[i] + 0x80) & 255);
		while (usec < 32) ; // wait
		usec = usec - 32;
	}
 	// gracefully ramp down 0x80 (dc bias) to zerofor (i=0x80; i > 0; i++) {
		analogWrite(3, i);
		while (usec < 120) ; // wait
		usec = usec - 120;
	}
	pinMode(3, OUTPUT);
	digitalWrite(3, LOW);
	// todo: enter lowest power shutdown mode
}

voidloop()
{
}

The final part, which of course I did first, is the audio.  I just used DownloadHelper to save the YouTube video.  Then I opened the .mp4 file with Audacity, to clip out only the 3.2 seconds for the entract sound.  I also used the low pass filter to filter everything above 10 kHz (it still sounds fine with 10 kHz bandwidth), and I applied some gain to the point of a tiny bit of clipping, so it would use the full range of the PWM.

Converting to the header file used by the code above was actually a 3 step process.  After Audacity, sox is used to convert to 31250 sample rate and 8 bit raw data.  Then a perl script reads the raw data and creates the header file.  I've included all those parts in the zip file below.

At the party last night, I brought 3 cheap red robes (searched Amazon for red robe and sorted by price, lowest first!) and 3 toy costume crosses (Robin found them at a craft store).  A friend brought a red hat and 2 soft cushions.  Much silly fun was had.


AttachmentSize
spanish_inquisition.zip391.42 KB

Quality Audio on Teensy3 with Arduino

$
0
0

Over the last couple weeks I've been working on supporting quality audio (44.1 kHz, 16 bit) on Teensy3 using very simple Arduino style programming.  This weekend I added buttons and knobs to control parameters....

This work is still at an early stage.  I hope to publish a first alpha test version in about 1 month...

Encoder Library Testing

$
0
0

In a recent forum conversation, it was suggested my Encoder library has only been tested with rotary knobs and "lab" signals, not a high-res encoder turned by a motor, implying it might not work "in the real world".  So I build this little test board and made a quick YouTube video!

Battery Pack Load

$
0
0

I purchased a cheap USB power pack, thinking it would be ideal for powering small projects.  But it automatically shuts off if the device isn't drawing a lot of power, since it's meant for charging cell phones.

Here's a 2 transistor circuit I built this morning that keeps it on with very little battery drain by using brief pulses.

Click "Read more" for the schematic, design details, and a PCB.....

I wish I would have thought of this idea, but it came from this forum post by "Jp3141".  The battery pack automatically turns off if it doesn't see a high current draw.  But drawing a high current for only a breif time is enough to keep its internal timer going.

First, I did some experimenting and found a 22 ohm resistor keeps the power on indefinitely.  A 27 ohm resistor kept it on for 19 seconds.  With no load, it stays on for only 13 seconds.  So a 22 ohm load it is!

Just connecting a 22 ohm resistor to the 5 volt power is a pretty heavy load that would drain the battery.  A 22 ohm resistor also burns about 1.1 watts, so it gets HOT.  But the load doesn't need to be on most of the time.  The next step was connecting a Teensy and transistor circuit to turn on the load under software control.

Here the 5V pin drives a LED in series with a NPN base-emitter junction, to apply about 2.3 volts to a 10 ohm resistor.  Of course, the NPN transistor has high current gain, so most of the 230 mA that flows through the 10 ohm resistor comes from the battery through the collector.

A little experimenting determined pretty quickly that pulses in the 8 to 10 ms range usually keep the battery pack on, but it sometimes turns off after a couple minutes.  20 ms seems very stable.

Knowing 20 ms is needed, I switched from using the Teensy++ to this simple 2 transistor oscillator:

A quick napkin calculation seemed to suggest this would need a really large capacitor.  But with a little fiddling, it turned out 22 uF was enough.  This circuit creates a pulse slight over 20 ms appoximately every 1.4 seconds.

Here's another close-up of the circuit on the breadboard.  Just 2 transistors, 1 capacitor, and 2 resistors.


I let this run for about half an hour, with the battery pack happily remaining on the whole time.


The average battery current is approx 3.5 mA.

While the transitors are on, the current is approx 222 mA (4.9V on 22 ohms).  But the duty cycle is about 1.6%.

Of course, inside the pack, a switching power supply is running to step up the batteries from 3.7 to 5 volts, and it's powering those 4 blue LEDs.  The internal stuff inside the pack probably wastes a lot more than only 3.5 mA.


Of course, then I did a quick PCB layout.  I added a switch in series with the 100K resistor, so it can be left plugged in and turned off to allow the battery pack to shut itself off.  It's a tiny board, only about the size of the USB connector itself.

I sent the files in to OSH Park.  Here's their preview.

Here's the board on their site, if anyone else wants to build this:

http://oshpark.com/shared_projects/Da8m8oAz

The 5 parts are on the bottom side of the PCB.  Here's a placement diagram:

Here's a list of part numbers:


1276-5649-1-ND        22 ohm resistor, 1/4 watt
490-1719-1-ND         22 uF capacitor, X5R, 6.3V
RMCF0603FT100KCT-ND   100K resistor
MMBT2222A-FDICT-ND    NPN Transistor
MMBT3906-FDICT-ND     PNP Transistor
WM17118-ND            USB Connector
EG1941-ND             Switch
 

If you need to tune the timing for a different battery pack, increasing the capacitor makes the pulse wider and lengthens the time between pulses.  Decreasing the 100K resistor makes the pulse occur more frequently, without changing the width of the pulse.


EDIT: my battery pack turned off a couple times times after many minutes.  I increased the capacitor to 47 uF and it ran for an hour.  22 uF might be a little on the low side?  If you build this circuit, a little tweaking on the capacitor or resistor values might be needed if your battery pack is different.


Maker Faire 2014

$
0
0

Maker Faire went really well.  I had a booth about the new audio library, and we also built a OctoWS2811 LED display for Freescale's booth.

Click "Read more" for more photos...


This is a large 4320 LED display we made for Freescale.  It plays 30 frames/sec video and 44100 sample/sec 16 bit audio from a SD card, using a single Teensy 3.1, OctoWS2811 adaptor, and a WIZ820+SD adaptor.

It's large and incredibly bright.  Even these photos from quite a distance away, in a brightly lit room, look like nighttime due to the camera's exposure adjustment.


The Freescale folks were showing stuff people have made with their chips.  The others I recall were the UDoo and a iMX6 laptop, which were also pretty awesome, but not nearly so bright.  Freescale has been really great to work with (far, far better than Atmel ever was for Teensy 2.0), and they agreed to cover the material cost, so I was happy to help them with a LED demo.

The complete (but very early) source code for playing from SD card with audio is available on this forum thread.  I'm planning to clean it up and roll it and other stuff into a new 1.2 release of OctoWS2811.

Here's a lengthy article I wrote about the LED video panel on the ARM community website.


AttachmentSize
FFT_LEDs.zip4.27 KB

Large LCD Reverse Engineering

$
0
0

Years ago, around the time DorkbotPDX's meetup moved from Vendetta to NW Lucky Lab, Ben Bleything brought LCDs from decommissioned point-of-sale terminals to the meetup.  I did some reverse engineering to get them working!

At the time, I wrote 3 blog articles aboug the reverse engineering effort.  Only one of them survived from the early days of this website.  Recently, I found the original text those old 3 articles, and also a small pile of the LCDs... which I'll be giving away at upcoming meetings!

Click "Read more" for those 3 original articles with the fine details of reverse engineering (and source code) for these old LCDs....

Blog #1 - Reverse Engineering the LCD

Last nice Ben brought a Micros 2700 POS terminal to the meeting. Here is one of the LCD screens:

The LCD is a Emerging model EG64E00BCWU (nice of them to put a sticker on the back side with the model number). Here is a datasheet for the LCD:

http://www.pjrc.com/tech/eg64e00bcwu/eg64e00bcwu.pdf

(this PDF file is attached below, in case this link ever becomes 404...)

Yes, it's 640 by 200 pixels with a CCFL backlight!

Unfortunately, the LCD doesn't have the controller chip (with nice interface) with a frame buffer built on board. It's on this similarly large card.

The QFP chip in the upper right (U1) is the controller chip. It's made by OKI and has "M6255" printed on it, which at first seems to turn up only datasheets for opamps. It turns out the part number is actually "MSM6255", and here is the datasheet:

http://www.pjrc.com/tech/eg64e00bcwu/msm6255.pdf

(this PDF file is attached below, in case this link ever becomes 404...)

The frame buffer memory isn't built in to the chip. That 28 pin part right below it seems to be the frame buffer memory. The MSM6255 has 2 busses (both 8 bit data, 16 bit address), one which connects to the frame buffer memory chip and the other to the CPU's memory.

That big chip in the center is a Z80 processor, and the two memory chip above it appear to be the firmware and RAM it uses. The big chip right below the frame buffer memory is a IDT7132 dual-port RAM chip, which I believe the designers used to communicate between this Z80 and the main Z80 that runs the rest of the terminal (together with several other Z80s). But really, who cares about that? I just want to figure out how to scrape all that stuff off and get access to the display....

So, with a printout of the MSM6255 pinout, I started tracing out where signals connect. The Address and Data busses are pretty straigtforward. I didn't trace the to the Z80 and dual-port RAM, though I'm pretty sure they go there. My intention is to pull all those chips off and drive the bus with my own micro.

Tracing the control signals is harder. They are connected to pullup resistors, so all over the place my meter auto-ranges from megaohms down to kiloohms, which makes the process so slowly. Anyway, here's what I've learned so far.

It also seems not all the power pins of all the chips are connected together. The LCD and its frame buffer, for example, do not connect to the same power as the Z80 and its memory.

More to come....

My hope is to get this thing working with a AVR, so everyone (who gets one from Ben) can play with one of these huge screens.


Blog #2 - LCD Almost Working

I'm getting close to making the LCDs work from Ben's Micro 2700 POS terminals (several of them are still up for grabs). Here's a photo.

More photos and technical details below...

First, I cut out almost all the chips. Here's a photos taken before I chopped all the chips off.

Really only 3 chips in the upper left corner are needed, the MSM6255 controller chip, the 32k RAM chip, and a 74HCT245 tri-state buffer. (those other 2 chips I left in place are buffers and transistors which seem to do startup stuff like reset pules and switching the RAM chip from battery backup to main power).

The MSM6255 has two busses, both 8 bit data, 16 bit addresses. One bus is for the Z80 microcontroller, and the other is a dedicated bus for the frame buffer RAM chip. The LCD controller only has 9 configuration registers, and a single instruction register. It only listens on 1 of the 16 address lines, which select between the instruction register or the 9 config registers. To write to the chip, you write to instruction register with A0=1, with the number of the config reigster you want. Then you write again with A0=0 to configure. Repeat this process 9 times to configure everything. However, a few of the reigsters only matter in character mode, and this board is wired only for graphical mode.

Since there are no other chips on the Z80 bus, I just wired the LCD controller chip select low (fount at U20, pin 10), and then it only takes 1 write select signal (found at U13, pin 11) to strobe the data in. Of course, A0 and the 8 data lines have to correct before pulsing the write pin low.

To access the frame buffer, the is a 74HCT245 tri-state buffer which causes the Z80 data lines to drive the frame buffer data lines. The LCD controller also has an address mux controlled by the DIEN signal. Both of these fortunately are high for the controller to access the frame buffer and low when the Z80 bus drives the RAM. So I just shorted them together (found at U19, pin 2 and 11). The RAM has its read signal low all the time. All I had to do was short the RAM CS signal low (found at U20, pin 6) to allow it to work.

The RAM write signal takes priority over read, so when you want to write new data into the frame buffer, all that's necessary is to drive DIEN and the '245 enable low to connect the Z80 bus to the frame buffer RAM (of course, set up the desired address and data first), and then pulse the RAM write signal low.

The frame buffer can be written at any time this way, but if this also happens to be at a moment when the LCD controller is reading, the screen will momentarily display whatever was on the frame buffer RAM data lines being driven by the 74HCT245 buffer. It appears this is the way the Micros 2700 worked.

The datasheet gives two suggestions for detecting times when the LCD controller isn't reading the data lines, and one of them isn't practical for large displays like this one. The other basically involves watching the CH0 signal from the controller and doing the framebuffer access right after it changes. I could not find the CH0 signal routed anywhere on the board, so I'm pretty sure Micros just didn't use it (they certainly didn't build the complex flip-flop sync circuit suggested in the MSM6255 datasheet). Maybe when I've got everything figured out I'll wire CH0 to a port pin and write a bit of code that waits for it to change right before I do the framebuffer write. It looks like CH0 is about a 560 kHz square wave, so that's plenty of time for a tight loop in the 18.432 MHz AVR to detect and complete the access. But for now, I'm not worrying about CH0.

So, here's my little circuit.

On the top are three 74HC164 shift register chips. These are connected to the MOSI and SCLK signals, so whatever the last 3 bytes were on the SPI port, they end up driving the Z80 address and data bus. The board has two headers that plug into the socket for the RAM chip that was dedicated to the Z80, so power, ground and all the address and data lines are connected there. That just leave the 2 write strobes for the LCD controller and frame buffer RAM, and the enable signal to drive the frame buffer bus. Only 3 extra signals! Well, maybe a 4th when/if I connect CH0 to avoid flicker.

The 28 pin chip is a ATMEGA88 - the same chip as the Aurdino, but only 8k of program memory. The chip on the left is a MAX232, and the white 3 pin connector is for a serial port that is intended to (someday) allow images to be downloaded easily. The little 8 pin chip on the right right is a 128K flash rom with SPI interface (Atmel AT45D011), which can hold 8 full-screem images, when I get all the pixels under control!

But not everything is working perfectly... yet. Here's what I get so far, trying to fill the entire frame buffer with 0x0F.

Those vertical bars are the desired pixels. They do change to other patters if I fill the frame buffer with other bytes. So at least I'm controlling some pixels.

Clearly, I haven't got the correct configuration for the LCD controller yet. The controller is designed to drive 2 sets of shift registers on the LCD, with 1, 2 or 4 bits per. This LCD seems to have only 1 shifter register with 4 bits, so I'm not entirely sure if I should use 2 or 4 bit mode, and exactly what the duty cycle setting should be isn't clear either. I've tried many different settings (mostly randomly), and so far none have been perfect.

I'll probably do one more session with the ohm meter to figure out more about how the LCD interfaces to the controller, and details about the frame buffer bus (which so far I've assumed is wired like the datasheet describes, but really all my probing has been on the Z80 bus and the many control signals).

Here are my latest notes/scribbles about how to connect the various signals.

I should also mention the stuff I learned about the power supply.

First, the simple part, the backlight. It's a cold cathode flourscent lamp, and there is a module inside the main power supply. It's attached to the high voltage board deep inside, and so far I've just left it alone. I did stick my meter probe in there (past all the live 120 volt stuff in the way), and it looks like that module takes 24 volts DC input. Not at nice as 5 volts, but still not too bad. It looks like it can be easily separated and liberated from the big hulking power supply. The one sad bit is there is only 1 in there, with a Y cable to drive both LCDs.... so if everyone wants one of these LCDs for a project, half of them will need to acquire or build a CCFL driver.

The not-as-simple part (but still a lot simpler than the LCD config and frame buffer bus) is the LCD drive voltage. The LCD runs on 5 volts for its logic, and a negative voltage, up to -19 volts. The parts on the far right side of the board are a little switching power supply that converts +5 into a variable negative voltage.

At first I thought the littl blue trim pot was the answer, but I kept getting very random results, especially if I touched the board. It turns out the chip in the lower right corner is a X9C103 digitally controlled pot, which adjusts the LCD drive voltage (which is what controls the contrast). I thought about hooking it up to the microcontroller, but in the interest of getting this thing to work, I simply clipped it off the board and wiring in a concention 10K pot, which you can see in the photo. However, the digital control pot is there on the board, so when/if anyone else uses all this, it's possible to control it from software. The X9C103 contains EEPROM memory to store the pot setting. I must have changed mine hundreds of times while touching the floating inputs with my fingers and wondering what I was doing that changed the LCD so much!

I had hoped to get this thing working before the next Dorkbot meeting, but it looks like I might have to put this whole thing on the shelf for a couple weeks (to make room for a paying project - which funds all this fun stuff....) I'm pretty sure I'll get the LCD config and frame buffer issues worked out, and when I do it's my hope everone in Portland Dorkbot who wants one of these displays can have one!


Blog #3 - LCD Working

The LCD is working! Here's a photo:

I wrote a little GUI program to load images onto the board. Here's a screenshot:

You can download everything with these links:

GUI App, Linux

GUI App, MacOS-X

Gui App, Windows (flakey) - requires mingwm10.dll

Gui App, Source Code

AVR Firmware Source Code and mega88.asm

Small Collection of Test Images

(these files are attached below, in case these links ever become 404 Not Found...)

I picked up a few more of the Micro 2700 terminals from Ben, and they're avaialble for free to anyone in Dorkbot who wants one (and is willing to carry it home from the meeting).

The wiring is pretty much like I described in the last entry... you need 3 control signals and the bus, which has 8 data lines and 16 address lines. I used SCK and MOSI to drive 3 shift register chips, so really this entire display interfaces with only 5 pins.


Extra Unpublished Info (from email) - Detailed Wiring Description

From the mail list..

I'd love to take one of the LCDs home at the next meeting. Would I need "the big card" as well to get them running via your instructions? I'm hoping to just follow what you wrote exactly and see if I can get one displaying something for myself.

Yes, the display needs to be driven by the MSM6255 chip and its related circuitry, which is on the big card. The other stuff is a RAM chip, which holds the currently displayed image (the "frame buffer"), which is continuously read by the MSM6255. There's also a '245 buffer chip, with lets you override the MSM6255's control of the RAM, so you can write new image data into it. The display runs on +5 volts, as does the card. The display also needs a negative supply, which is produced from the +5 by the circuitry on the far edge of the card.

The motherboard has what looks like the same circuits on it, used to drive the other display. I haven't traced out of the signals on the motherboard like I did on the card, but if people use up the cards and can't figure out where to tap the signals on the motherboard, I could do it.

To use the display, you need to connect 8 data lines, 15 address lines, and 3 control signals (and short a couple signals to ground - and of course remove all unnecessary chips). Because the MEGA88 has so few I/O pins, I used three 74HC164 shift register chips connected to MOSI and SCLK to get all the address and data lines. If you used a chip like the MEGA644P with lots of I/O pins, you could probably just use I/O pins and not worry about the shift registers. Then again, there are never enough I/O pins so using only MOSI and SCLK is nice, even if it takes a little time to wait for the 3 bytes to shift out.

The 15 address and 8 data lines are all available at the socket for the EPROM or the right-most RAM chip (the one not used by the MSM6255). I built my board to just plug into the RAM chip socket to connect those 23 lines and also get power. That left only 3 wires to run to the rest of the board.

To write into the frame buffer is really very simple. You just output the 8 bit data you want, and the 15 bit address where you want it written. Then you drive the '245 enable line low to take control of the RAM chip, and then drive the write strobe low to write the data. Then rise the write line back high to complete the write, and the enable signal back high again to allow the MSM6255 to keep using the RAM normally. The buffer enable signal also connects to the DIEN pin on the MSM6255, so your 15 address lines get fed though the MSM6255 to the RAM while the buffer feeds your data to it. It's nice that they made both of them high for normal display operation and low for access to the RAM. There's also one other write strobe, which you use (without the buffer enable) to write configuration into the MSM6255 (see the MSM6255 datasheet for details, and my code for the config guesswork I did that seems to work pretty well - though other configs might be possible).

The one other thing you need to do is control the LCD negative voltage. There is a digitally controlled pot on the board. I just cut if off and wired in a normal pot, which was a lot easier for reverse engineering the display (while trying to guess the MSM6255 config settings, turning the pot back and forth and viewing from different angles could let me guess if parts of the LCD were being double-scanned from incorrect config - and believe me, I tried many incorrect settings!) If you want software control of the contrast, you might try configuring the pot? That should be pretty easy to troubleshoot since you can just measure the voltage as you try it. If you're going to replace with a normal pot, you'll need a 10K linear taper (maybe on the group order?)

I didn't draw a nice schematic (and don't plan to - but all the source code is online).... but maybe someone will draw something up to help others?


AttachmentSize
eg64e00bcwu.pdf174.49 KB
msm6255.pdf483.71 KB
GUI_App_Linux.zip745.82 KB
GUI_App_MacOSX.zip1.84 MB
GUI_App_Windows.zip1.21 MB
AVR_Firmware_Source_Code.zip4.87 KB
test_images.zip179.39 KB

RFM69 Wireless & SPI Bus Sharing (feedback wanted...)

$
0
0

Recently I've been working to improve the Arduino SPI library, to better support multiple SPI devices with different settings, and SPI devices requiring interrupts.

Today I discovered a new problem while testing the HopeRF RFM69 wireless module.

Click "Read more" for details and the workaround I found....

First, this article is meant to publically document what I've found and invite conversation with anyone else who might have experienced similar issues.  It's very difficult to know if this problem is caused by buggy software, faulty hardware, or radio interference.  Please comment below, or on this forum thread, if you have any insight or opinions.

In a nutshell, I've been working on new Arduino SPI library functions to allow SPI devices with different settings and usage of attachInterrupt, where the interrupt routine uses SPI.transfer(), to hopefully work together.  With the SPI library from Arduino 1.0.5 & 1.5.7, usage from within an interrupt routine can occur while the main program is using SPI.transfer with another device's chip select active, and of course each device might need very different SPI settings.

As part of this testing, I've been working with the Ethernet library using a WIZ820io module and the RadioHead library with a RFM69W wireless module.  The Ethernet library used with Teensy has a patch to allow either W5100 or W5200 chips, so the normally unsupported WIZ820io works fine.  In my testing, I've patched both libraries to use the new SPI.beginTransaction() and SPI.endTransaction() functions, and RadioHead uses SPI.usingInterrupt(), to let those 2 functions know which interrupt needs to be masked while the Ethernet library is using SPI.

So a caveat is that I've working with 3 patched libraries.  There's a lot of uncertainty here.

My test program uses a Teensy 3.1 to send a request to another board running RadioHead's "rf69_server" example, and also a HTTP request to fetch a web page.  Then it tries to receive both of them.  I'll attach the code below.

The RFM69 is unable to receive while the Ethernet library polls the WIZ820io.  I spent hours carefully checking the waveforms on my oscilloscope.  At first I thought this must be a bug in my code.  But it's easy to see the 2 chip selects never assert simultaeously, as they might if SPI.beginTransaction didn't mask the interrupt while Ethetnet uses SPI.  It's easy to see the other device is sending the reply, because its LED blinks when it transmits on its RFM69.  They're sitting right next to each other on my desk (the first photo) and with a line uncommented in the code to cause the Ethernet polling to wait 20 ms, the radio reply is always received correctly.

Finally, in an act of desparation, I build this little hack to force the SCK signal low at the RFM69 when its NSS chip select is idle (high).

Amazingly, this works!  It allows the RFM69 to receive, while the Ethenet module is polling.

I'm still not ready to conclude the RFM69 has a hardware bug, where activity at the SCK input, which ought to be ignored while NSS is high, might be causing it to miss incoming radio data.

It's entirely possible the communication could be creating radio interference.  My little adaptor board has a ground plane between the RFM69 and the digital signals (I'm a little paranoid of messing up RF stuff).

It's also possible my software has a bug, even though the waveforms appear to be fine on a scope.  I might have missed something.

Anyway, here's a quick schematic for that little circuit.

I also created a new adaptor board with this circuit.

Here are my patched copies of these libraries:

https://github.com/PaulStoffregen/SPI

https://github.com/PaulStoffregen/Ethernet

https://github.com/PaulStoffregen/RadioHead

At this point, the big question is whether I've made a mistake somewhere (entirely likely), or if the RFM69 module really has some sort of issue where SPI bus usage by other devices, with the RFM69's NSS signal high, causes trouble with radio reception?

If you've used the RFM69 or similar HopeRF modules on a SPI bus with a lot of other activity, please reply or comment on the forum thread.  I'd really like to hear about your experiences.

AttachmentSize
rf69_client_and_ethernet.zip1.66 KB

SPI Transactions in Arduino

$
0
0

For the last several weeks, I've been working on SPI transactions for Arduino's SPI library, to solve conflicts that sometimes occur between multiple SPI devices when using SPI from interrupts and/or different SPI settings.

To explain, a picture is worth 1000 works.  In this screenshot, loop() repetitively sends 2 bytes, where green is its chip select and red is the SPI clock.  Blue is the interrupt signal (rising edge) from a wireless module.  In this test, the interrupt happens at just the worst moment, during the first byte while loop() is using the SPI bus!

Click "Read mode" for lots more detail.....

Without transactions, the wireless lib interrupt would immediately assert (active low) the yellow chip select while the green is still active low, then begin sending its data with both devices listening!

With transactions (shown above), this interrupt is masked until the green access completes.  Not shown is the fact other unrelated interrupts remain enabled, so timing sensitive libs like Servo & SoftwareSerial aren't delayed, only interrupts using the SPI library.  SPI transactions also manage SPI settings, so each device is always accessed with its own settings, as shown here with the fast clock during green and slower clock during yellow.

Here's a more involved test case with Adafruit CC3000 and the SD library.

Hopefully soon this new SPI code will become part of Arduino's officially published SPI library and as SPI-based libs update to use the new functions, strange conflicts between SPI devices will become a thing of the past.

This new transaction support is being done in collaboration with the Arduino developers.  In fact, Matthijs Kooijman really deserves credit for the SPISettings portion of this work, as that part and the AVR implemention of it was his work.  Mikael Patel contributed many valuable insights, based on his COSA project, and Cristian Maglie (Arduino's technical lead) created benchmarks to study the performance impact these new functions might have.  Nantonos also contributed, by writing detailed documentation for these new SPI functions.

This work adds 3 new functions to the SPI library.

  SPI.beginTransaction(SPISettings);
  SPI.endTransaction();
  SPI.usingInterrupt(number);

In a netshell, SPI.beginTransaction() protects your SPI access from other interrupt-based libraries, and guarantees correct setting while you use the SPI bus.  SPI.endTransaction() tells the library when you're done using the SPI bus, and SPI.usingInterrupt() informs the SPI library if you will be using SPI from a function through attachInterrupt.

The new SPISettings is a special data type, just for describing SPI clock, data order and format.  For fixed settings, you can use beginTransaction(SPISettings(clock, order, format)), and the compiler will automatically inline your fixed settings with the most optimal code.  For user controlled settings, you can create a variable of SPISetting type and assign it based on user choice, which you don't know in advance.  This allows a very efficient beginTransaction(), because the non-const settings are converted to an efficient form ahead of time.

For example, you might use these new functions this way, for fixed settings:

int readStuff(void) {
  SPI.beginTransaction(SPISettings(12000000, MSBFIRST, SPI_MODE0));  // gain control of SPI bus
  digitalWrite(10, LOW);         // assert chip select
  SPI.transfer(0x74);            // send 16 bit command
  SPI.transfer(0xA2);
  byte b1 = SPI.transfer(0);     // read 16 bits of data
  byte b2 = SPI.transfer(0);
  digitalWrite(10, HIGH);        // deassert chip select
  SPI.endTransaction();          // release the SPI bus
  return (int16_t)((b1 << 8) | b2);
}

This approach generates the most efficient code, because the SPI settings are fixed.  SPISettings compiles to optimal code, thanks to Matthijs Kooijman's nice work!

The other awesome feature of SPISetting is hardware independence.  Any clock speed can be specified as a normal 32 bit integer.  There's no need for "dividers" that require knowing your board's clock rate.  Matthijs's code inside SPISettings efficiently converts those integers to the dividers used by the hardware.  The clock speed you give to SPISettings is the maximum speed your SPI device can use, not the actual speed your Arduino compatible board can create.  The SPISettings code automatically converts the max clock to the fastest clock your board can produce, which doesn't exceed the SPI device's capability.  As Arduino grows as a platform, onto more capable hardware, this approach is meant to allow SPI-based libraries to automatically use new faster SPI speeds.

For non-const settings, on libraries that allow the user to set the clock speed or other settings, you can create a SPISettings variable to hold the settings.  For example:

SPISettings mySettings;

void useClockSpeed(unsigned long clock) {
  mySettings = SPISettings(clock, MSBFIRST, SPI_MODE3);
};

void writeTwoBytes(byte a, byte b) {
  SPI.beginTransaction(mySettings);  // gain control of SPI bus
  digitalWrite(10, LOW);             // assert chip select
  SPI.transfer(a);                   // send 16 bit command
  SPI.transfer(b);
  digitalWrite(10, HIGH);            // deassert chip select
  SPI.endTransaction();              // release the SPI bus
}

The simplest way to use SPI transactions involves SPI.beginTransaction() right before asserting chip select, and SPI.endTransaction() right after releasing it.  But other approaches are possible.  For example, my SPI transaction patch for the Ethernet library implements transactions at the socket level.  In the SD library initialization, 80 clocks are sent with chip select high to prep the SD card, as another example where transactions to not necessarily correspond to chip selects.  This design is meant to be flexible, and easy to add to the dozens of existing SPI-based libraries.

The new SPI.h header defines a symbol SPI_HAS_TRANSACTION, to allow library authors to easily add SPI.beginTransaction() and SPI.endTransaction() inside #ifdef checks, for libraries supporting a wide range of Arduino versions.

The one other new function is SPI.usingInterrupt(), which informs the SPI library you will be using SPI functions from an interrupt.  It takes an integer input, which is the same number you use with attachInterrupt().

Newer versions of Arduino have a digitalPinToInterrupt() function, which is useful for converting Arduino pin numbers into their interrupt numbers, and it can tell you whether a pin has interrupt capability.  Here's how it would be used:

void configureInterruptPin(byte pin) {
  int intNum = digitalPinToInterrupt(pin);
  if (intNum != NOT_AN_INTERRUPT) {
    SPI.usingInterrupt(intNum);
    attachInterrupt(intNum, myInterruptFunction, RISING);
  }
}

The main idea is a call from your SPI-based library using interrupts causes OTHER libraries to temporarily mask the interrupt your library uses, so your interrupt won't conflict with their SPI activity and the SPI bus will be free when your interrupt function runs.


Developing and testing this function SPI sharing functionality has been a long and difficult path.  Since April, the API was discussed in great detail before Cristian Maglie (Arduino's technical lead and the man who ultimately decides what contributions Arduino will accept) ultimately decided on this approach, using a hybrid of my original proposal and Matthijs's SPISettings.  All contributions to a very widely used system like Arduino involve some controversy... there's *always* someone who doesn't like change or wants things done differently.  Luckily, after about 6 weeks of discussion, a clear path was chosen (by Cristian).

I should also mention how rare and insidious these SPI conflicts are.  Even with my intentional test case, rapidly re-reading a file from the SD card while the Adafruit CC3000 library is likely to interrupt, the data would often be read without error.  The SPI port is very fast and the AVR processor is quite slow, so even in a worst case, the window of opportunity for conflicts is small.  Many "normal" programs might see errors very rarely.  Sketches written in very simple ways, where you wait for all activity on one device to finish before using another, are unlikely to ever have conflicts.  The rare nature of these problems has led many people to question the need for this work, but I can assure you (or you could run the test code yourself) these conflicts are real and eventually cause data error or even complete lockup if the interrupt strikes are just the wrong moment.

Hopefully soon, Arduino will publish a new version with this updated SPI library, and over time, the many SPI-based Arduino libraries will gradually update to use these functions.  I want Arduino to be a very solid platform, not just for people using my own Teensy boards, but for all Arduino compatible products... which is why I've put so much work into this SPI library update over the last several weeks.


Display & SPI Optimization

$
0
0

Recently I've been working on an optimized ILI9341 display library, to take advantage of Teensy 3.1's more capable SPI hardware.  Here's a quick video demo, so you can see how much of a difference it makes.

In the transition from 8 to 32 bit microcontrollers, on-chip SPI ports usually gain more sophisticated features.  Special programming is needed to fully levergage these more powerful features.  Merely recompiling code designed for simple SPI hardware on 8 bit hardware rarely acheives the best performance.  As you can see in the video, optimizing for these features makes a pretty dramatic improvement.

Click "Read more" for the all the technical details...

Fast SPI Clock & 32 Bit ARM

Some of the speed increase comes from the simple fact that Teensy 3.1 is based on a Freescale Kinetis chip with 32 bit ARM Cortex-M4 processor, which is significantly faster than the Atmel 8 bit AVR on Arduino Uno.  Uno's maximum SPI clock speed is 8 MHz, whereas Teensy's SPI clock can go up to 24 MHz.

However, faster clocks, without the special optimizations described in the rest of this article, only provide modest speed increase.  Only special code to fully leverage the more sophisticated SPI hardware, together with a faster CPU, can give the massive speed increase shown in the video.


SPI FIFO Buffering

The 4 word FIFO in Teensy 3.1's SPI port is the key to improving overall SPI throughput.  Without the FIFO, software must wait for the SPI hardware to finish transmitting before it can write new data.  In principle, the software could begin working on the next byte while the priot byte transmits, but in practice that is very difficult to achieve in the software design.

When writing to the SPI port on 8 bit AVR, the code waits for each byte to be fully transmitted on the MOSI pin, and it returns the bits received on the MISO pin.  This results in very simple and easily maintainable source code, but it results in long gaps between bytes on the SPI bus.

Here are the SPI signals for the Arduino Uno.  Even though the SPI port uses an 8 MHz clock, less than half of the available bus time is actually used, due to significant software overhead.

On Teensy 3.1, using a Freescale Kinetis K20, the SPI port has a 4 word FIFO.  In most cases, 4 words is enough buffering to allow for the software overhead to compute more data to occur while previously written words are still transmitting.

As you can see in these waveforms, only a small gap is present between each word, limited only by the SPI port's timing.  The SPI bus is nearly fully utilized, and of course the clock speed is higher (this screenshot is on a 4X faster time scale).

Actually using the SPI FIFO is a task more easily said than actually done.  Several approaches were attempted throughout the development of these display optimizations.

Often when writing to hardware registers, a status bit or flag is read to check if the hardware is ready to receive data, and then then the actual data is written.  However, that approach adds significant overhead when the hardware is ready, with the FIFO empty and the SPI bus idle.

A "write first, ask questions later" technique used in this display optimization always leaves at least 1 word of space available in the FIFO, which allows new data to always be written as quickly as possible.  Then the FIFO is checked for full status and the code waits until at least 1 word is free.

        void writecommand_cont(uint8_t c) __attribute__((always_inline)) {
                // write first
                SPI0.PUSHR = c | (pcs_command << 16) | SPI_PUSHR_CTAS(0) | SPI_PUSHR_CONT;
                // ask questions later
                waitFifoNotFull();
        }

Using only 3 of the 4 words in the FIFO turns out to be a good trade-off, because it always slightly accelerates the commonly occuring case of a new drawing operation writing its first data to the empty FIFO.  3 words of buffering is usually enough to sustain maximum speed data flow.

A challange to use the SPI FIFO for this application, writing as rapidly as possible to MOSI while disregard all incoming data from MISO, is properly balancing read with writes, so extra data isn't left in the receive FIFO.  I must confess, it took a few iteration on this latest, most optimized code to get it right.  It's quite a bit more difficult that the simple but slow approach where you always write and then read a single byte.


16 Bit SPI Transfers

The SPI port requires a small idle time between words, even when another word is waiting in the FIFO.  Words up to 16 bits are supported.  When 8 bytes need to be sent, they can be combined into a 16 bit word to avoid the idle time.

In this screenshot, 5 bytes are transmitted, but only 3 SPI idle times are needed because 4 of them are send using two 16 bit writes.

Much of the display data is 16 bits, such as X and Y coordinates and 5/6/5 color values.  The 16 bit words occupy only a single entry in the SPI FIFO, so 16 bit writes also entend the time allowed for software to generate more data without the SPI bus going idle.


Hardware Control of Register Address & Chip Select

On 8 bit AVR processors, the chip select signal needs to be created by manipulating a GPIO pin.  For example, the AVR code running on Arduino Uno in the video demo uses this:

      void Adafruit_ILI9341::writecommand(uint8_t c) {
        *dcport &=  ~dcpinmask;
        *csport &= ~cspinmask;
        spiwrite(c);
        *csport |= cspinmask;
      }

These extra writes to GPIO registers add overhead.  They also require waiting for all 8 bits to full transmit, which greatly increases the difficulty of attempting to do any work while the SPI port is sending a byte.  For complex libraries, like color graphical displays, structured programming and maintainable code usually a preferred over "spagetthi code" which might try to perform different tasks during the very short time needed to transmit 1 byte.

Fortunately, Teensy 3.1's SPI port can control up to 5 "chip select" lines.  Two of them are used to control the chip select and data/command address line.  The result is virtually zero extra overhead to manipulate these 2 pins.

Each word in the SPI FIFO also has 5 bits for the 5 possible signals.  This allows the display software to write commands and data into the FIFO, without waiting.  At the SPI port uses the FIFO contents, it automatically controls both the chip select and the data/command address line.  As you can see in this screenshot, in most cases command and data are transmitted to the display with only the minimum SPI idle time between each word.

However, controlling these signals does come with a cost in software complexity.  Each write to the SPI port must also have a bit that tells the SPI peripheral whether to continue asserting the signals, or to de-assert them when the write is completed.  This means the last write in a group must be done differently, requiring loops to be restructured so the last iteration calls the non-continue SPI write.


Display Window Addressing

Other optimizations have been added to the code, which might help on 8 bit AVR processors, but are dramatically more effective with the faster 32 bit ARM processor and FIFO-based SPI hardware.

For example, there is the simple diagonal line drawing code.

        for (; x0<=x1; x0++) {
          if (steep) {
            drawPixel(y0, x0, color);
          } else {
            drawPixel(x0, y0, color);
          }
          err -= dy;
          if (err < 0) {
            y0 += ystep;
            err += dx;
          }
        }

The drawPixel() function requires 11 bytes of SPI communication to set up the ILI9341 address window, then 2 bytes to actually write the color to the pixel.

This optimized version combines groups of horizontally or vertically adjacent pixels into a single operation, which requires 11 bytes for the entire line, and then 2 bytes per pixel.  Any line at an angle other than 45 degrees involves at least some 2+ pixel segments.  Because the ARM processor is fast and can do all this 16 bit integer math in single-cycle operations, and because the SPI FIFO is capable of buffering typically 5 or 6 bytes of prior output, this extra work to avoid the 11 byte address window setup rarely results in SPI idle time.

        int16_t xbegin = x0;
        if (steep) {
                for (; x0<=x1; x0++) {
                        err -= dy;
                        if (err < 0) {
                                int16_t len = x0 - xbegin;
                                if (len) {
                                        VLine(y0, xbegin, len + 1, color);
                                } else {
                                        Pixel(y0, x0, color);
                                }
                                xbegin = x0 + 1;
                                y0 += ystep;
                                err += dx;
                        }
                }
                if (x0 > xbegin + 1) {
                        VLine(y0, xbegin, x0 - xbegin, color);
                }

Another optimization uses here is inline coding of the Pixel(), VLine() and HLine() functions.  These are designed to continue form write, keeping the signals asserted and making best possible use of the FIFO, until the entire line is drawn.  Use of these special inline functions in drawLine() and other functions does increase the compiled code size, typically by about 5K to 8K.  On Teensy 3.1, where the flash memory is 256K, an extra 5K to 8K is usually a good trade-off for a significant speed boost.  But on Arduino Uno, where only 30K of flash is available for code and nearly 20K is already used, these types of optimizations that increase code size aren't usually viewed favorably.


Future Work on Large Fonts

In a future version, I hope to implement arbitrary size bitmap fonts, with support for fast drawing of very large characters.  The existing library only supports a single 5x7 font, with simple scaling, which looks quite blocky when scaled up to easily readable sizes on these small displays.

A large 50 to 90 pixel bitmap will look wonderful on these displays.  Here is a lengthy message with my plans for supporting fast & large bitmap fonts.  I'm really hoping someone with an interest in Python or other scripting languages might get involved in the project, to convert fonts into a special list-of-blocks format.


Credit Where Credit Is Due

All of this work is based on the open source libraries published by Adafruit Industries.  Limor Fried and Kevin Townsend have put a tremendous amount of work into Adafruit's many display libraries.  I highly recommend buying Adafruit products to support their efforts.

Peter Loveday wrote the earliest optimizations for these libraries on Teensy 3.0.  My work on these optimizations continued on the path Peter started.  Kurt Eckhardt was the first to port these optimizations to the ILI9341 chip.  I've since redesigned much of the code.


Node-RED Hacking - Audio Library Front-End

$
0
0

When I started the Audio library, a nice GUI (like Puredata or Max/MSP) seemed an impossibly distant dream.  Then, in this forum thread, I learned of the open source Node-RED project.

Over the last few days I've been coming up to speed on modern Javascript tools like jQuery and D3, to hack Node-RED into a GUI front-end.  Much work still needs to be done before this is usable, but I'm pretty excited about the possibilities!

Viewing all 53 articles
Browse latest View live